Introduction
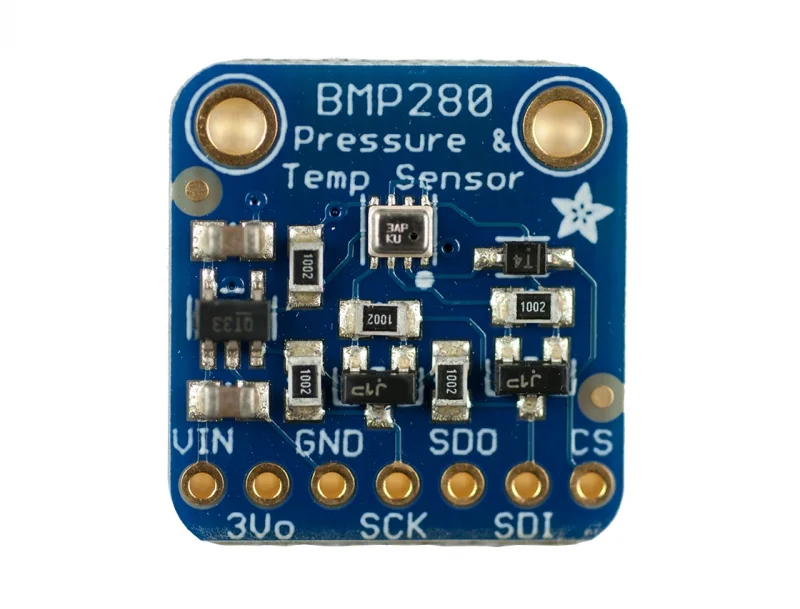
In this tutorial we will use the Adafruit BMP280 sensor. This sensor can measure barometric pressure and temperature with very good accuracy. Because pressure changes with altitude we can also use it as an altimeter with ±1 meter accuracy! Accuracy for barometric pressure is ±1 hPa and ±1.0°C for temperature.
You can connect it with your Arduino board with I2C or SPI connection protocol. It has a 3.3V regulator and level shifting so you can use it with a 3V or 5V logic micro controller without any problems.
In this tutorial we will use the Arduino UNO board with this sensor and the serial monitor of Codebender to print measured values every 5 sec.
So, let's get started!
What you will need
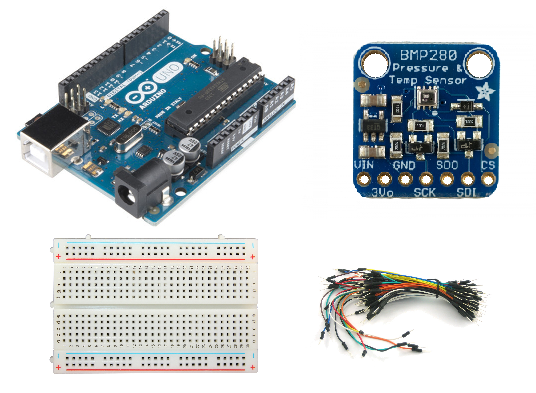
For this tutorial you will need:
- Arduino uno
- Breadboard (or breadboard shield)
- Adafruit BMP280
- Some breadboard cables
The Circuit
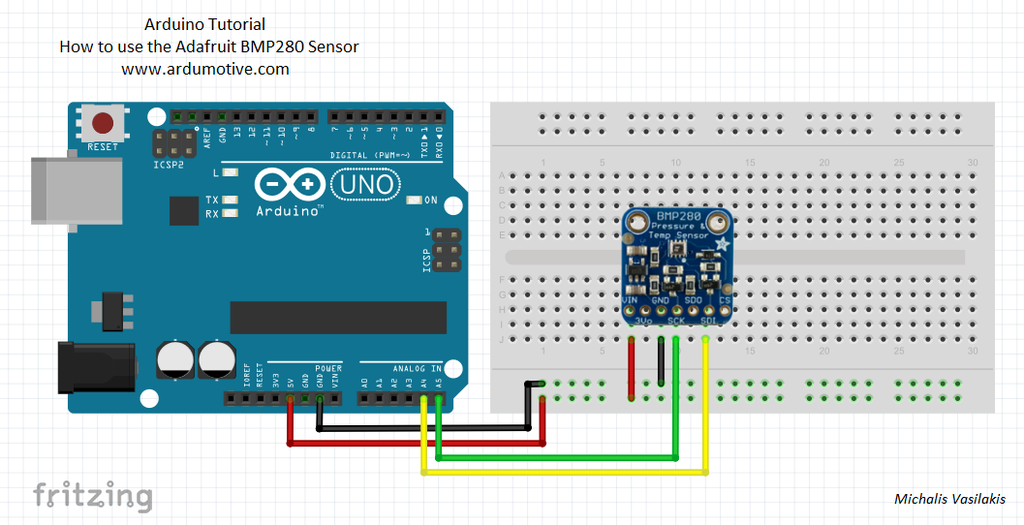
The connections are pretty easy, see the above image with the breadboard circuit schematic.
We will use the I2C connection (SCL and SDA pins)
Connections of the Adafruit BMP280 sensor:
- Vin to Arduino 5V pin
- 3Vo
- GND to GDN
- SCK to Arduino SCL pin (A5)
- SDO
- SDI to Arduino SDA pin (A4)
- CS
The code
Here's the code, embedded using Codebender!
Try downloading the Codebender plugin and clicking on the "Run on Arduino" button to program your Arduino board with this sketch. And that's it, you've programmed your Arduino uno board with this sketch!
Measured values
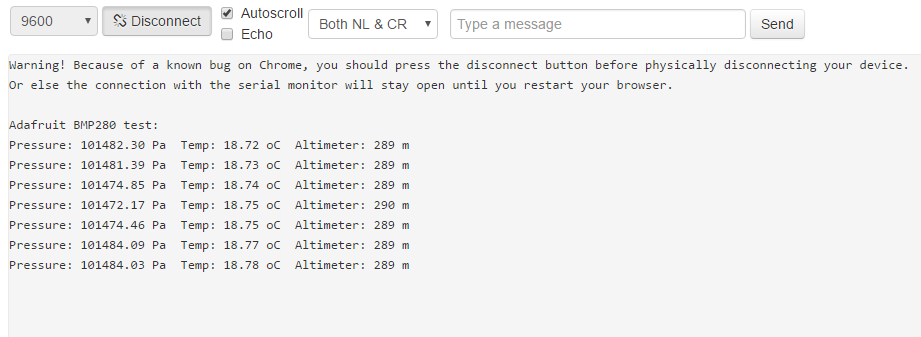
Press the "connect" button to the serial monitor of Codebender below:
Well done!
You have successfully completed one more "How to" tutorial and you learned how to use the Adafruit BMP280 sensor with the Arduino uno board.