Introduction
In this tutorial you will learn how to use the Adafruit Trinket board and how you can easily program it with Codebender!
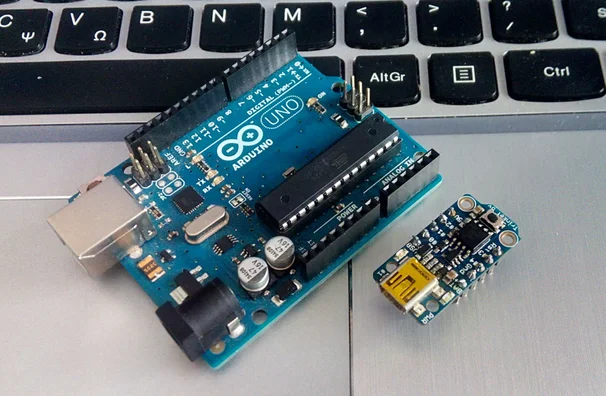
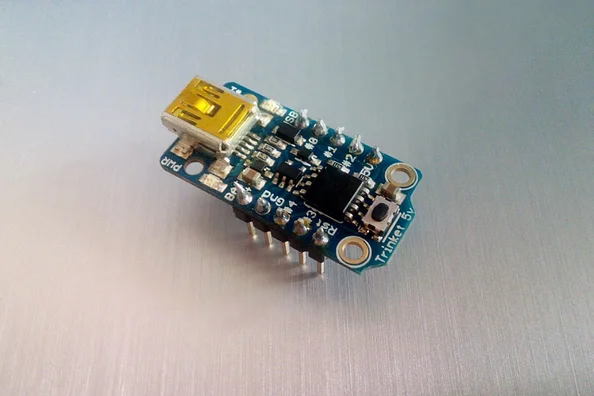
This tiny board is using the ATtiny85 microcontroller and it has 8K of flash memory, 5 I/O pins (including analog inputs and PWM outputs) and a USB connection (mini-USB). It can powered up by usb cable or external battery.
You can find two versions of Trinket board: 3V and 5V. The only difference between them is the operating 'logic' voltage.
About the ATtiny85 and Trinket
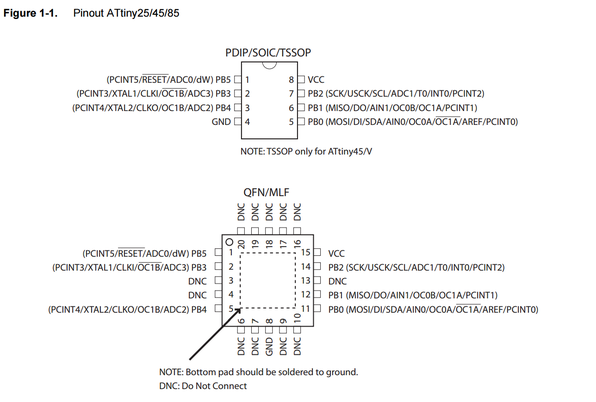
ATtiny85 microcontroller:
- 8K of flash
- 512 byte of SRAM
- 512 bytes of EEPROM
- Internal 8MHz oscillator (it can be doubled in software for 16MHz - only on 5V version of Trinket)
- 5 I/O (with 3 analog inputs and 2 PWM pins)
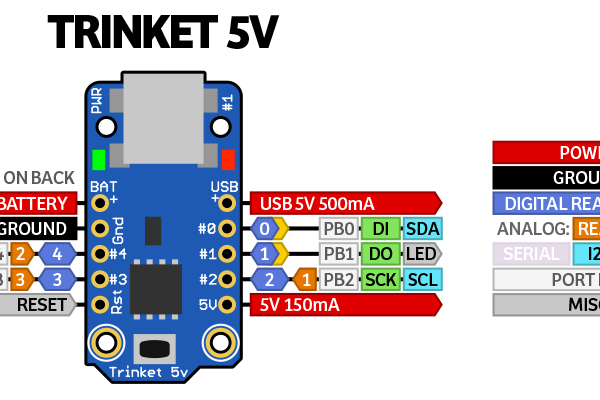
Trinket board specs:
- USB bootloader with an LED indicator
- Mini USB jack for program uploading
- ~5.25K bytes available for use (2.75K taken for the bootloader
- Available in both 3V and 5V
- On-board 3.3V or 5.0V power regulator with 150mA output capability and ultra-low dropout
- Up to 16V input, reverse-polarity protection, thermal and current-limit protection
- Power with either USB or external output (such as a battery) - it'll automatically switch over
- On-board green power LED and red (pin #1) LED
- Reset button for entering the bootloader or restarting the program
- Hardware I2C / SPI capability for breakout & sensor interfacing
- Mounting holes, you can easily attach it to breadboard or plug it in your own circuit board!
You can find more info for Trinket pinout in official Adafruit site here
First time of using it?
If this is the first time you are using the Codebender or the Trinket board with your computer, click here and follow the guide to install the browser plugin and the Arduino drivers.
You should see the green power LED lit and the red bootloading LED pulse indicating that the Trinket is ready to start bootloading. If you've programmed the Trinket since getting it, you can always get it back to the bootloader state by pressing the small onboard reset button
Note:
If you are using Windows 10 (or something goes wrong with drivers installation for this device):
Click here and download the zip file by clicking the green box "Download Signed Adafruit Trinket/Gemma Driver".
Unzip files and then plug in the Trinket with the USB cable to start the process.
Now you have to go on Device manager, find Other devices, double click on Trinket, "Update Driver Software" and then click on "Browse my computer for driver software". Find the folder that you have unzip the drives package and click next and install.
If you find any problems with this procedure you can read this detailed guide at official Adafruit website.
Program it with Codebender!
Now we can write our first program for Trinket board!
We will use the Codebender to program the board but if you still want to use the Arduino IDE you have to install Adafruit boards on it first. Just follow the instructions on this link.
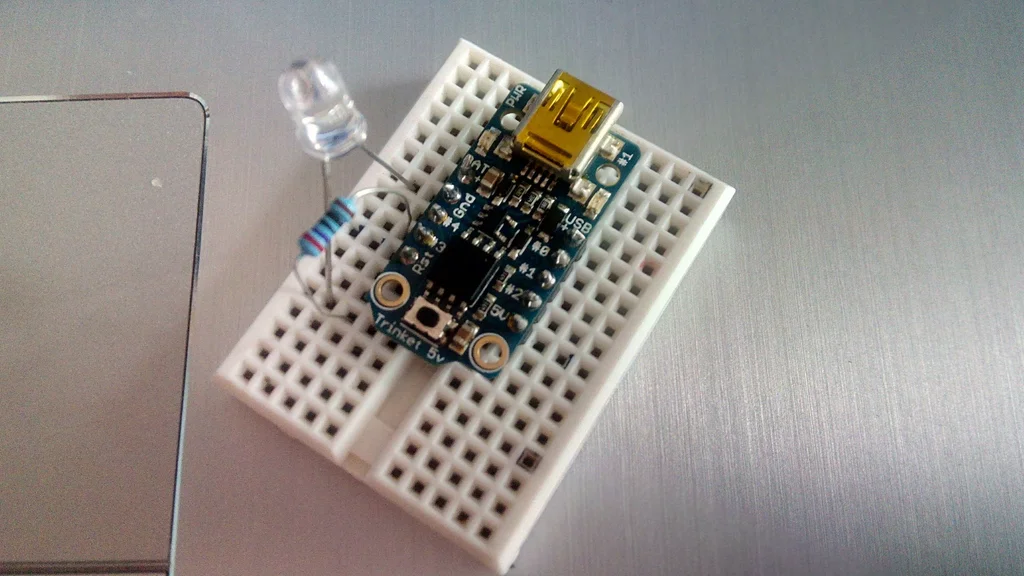
To build the circuit, connect one end of the resistor to Trinket pin 3, then connect the long leg of the LED (the positive leg, called the anode) to the other end of the resistor. Now connect the short leg of the LED (the negative leg, called the cathode) to the Trinket GND pin.
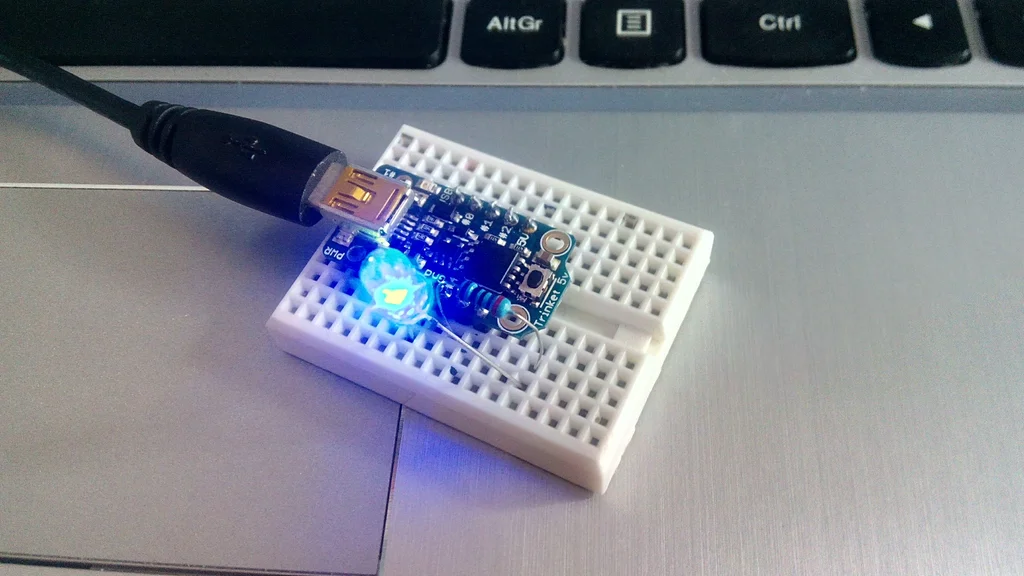
Now connect the Trinket board with your computer, select "Adafruit Trinket 8MHz" from boards menu and leave as it port selection. Now click the "Run on Arduino" button. That's it, you've programmed your Trinket board with blink sketch!
You will see your LED blinking every 3 seconds.
Update: Chrome support for Gemma/Trinket changed in November 2015, so if it doesn't work, try Firefox
You can keep playing with that by clicking the "Edit" button and start making your own modifications to the code. For example you can add a second led or change the delay time.
Well done!
You have successfully completed one more "How to" tutorial and you learned how to use the Adafruit Trinket board with Codebender.
I hope you liked this, let me know in the comments.