
In this tutorial you will learn how to use a voice recognition - serial - module with the Arduino uno board. This module can store up to 15 voice commands. Those are divided into 3 groups, with 5 commands in each group.
First we should train the module with voice instructions group by group. After that, we should import one group before it could recognize the 5 voice instructions within that group.If we need to implement instructions in other groups, we should import the group first. Only one group can be active per time.
In this tutorial we will use an RGB LED and we will try to change the color of it with voice commands.
So, let's get started!
What you will need
For this tutorial you will need:
- Arduino uno
- Breadboard (or breadboard shield)
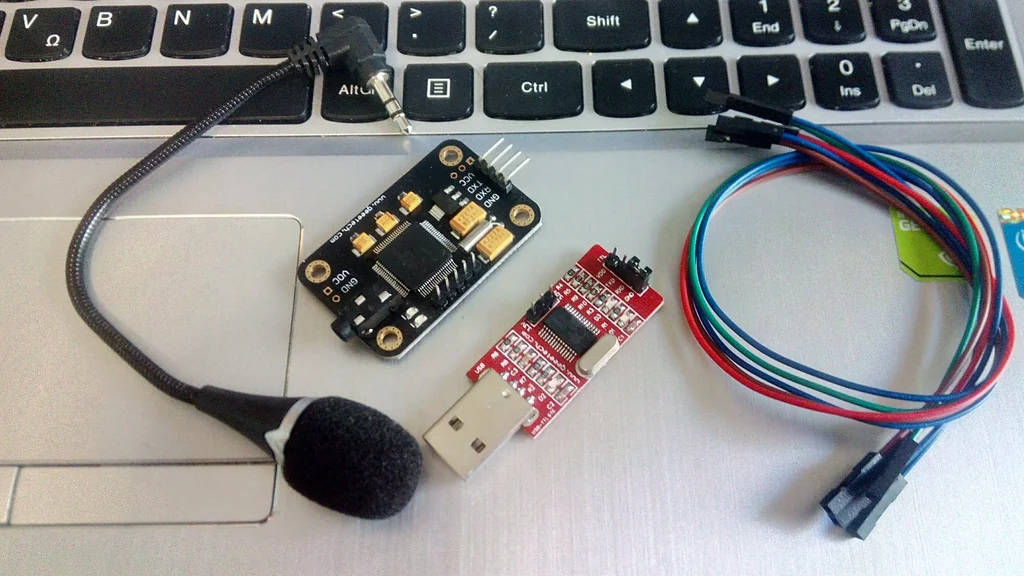
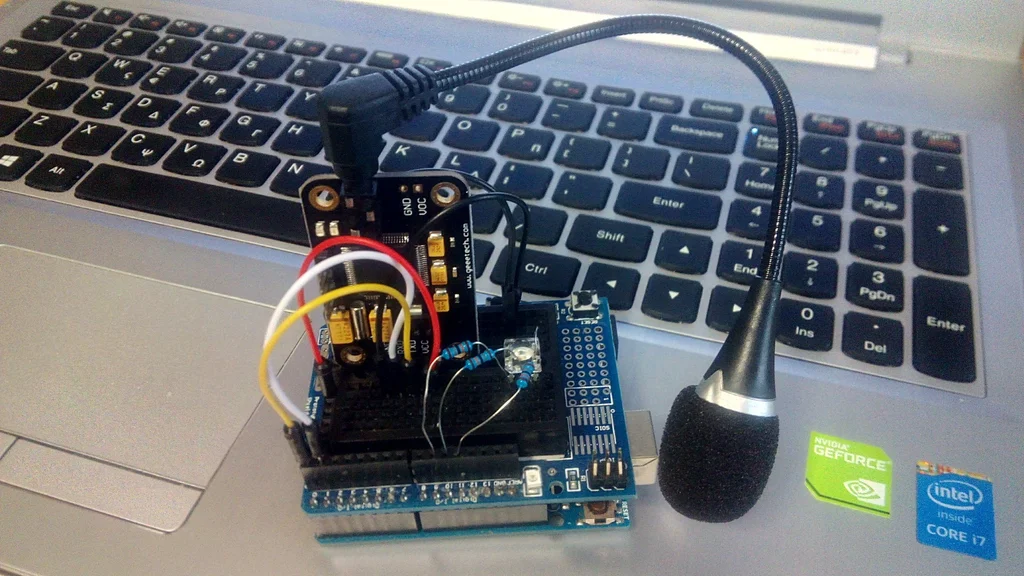
- Voice Recognition Module (serial)
- Microphone
- RGB LED
- 3x 220 Ohm resistors
(optional an usb to serial module)
Recording
The first thing that we have to do is to record voice instructions/commands. Each voice instruction has the maximum length of 1300ms (1.3sec), which ensures that most words can be recorded. Once you start recording, you can’t stop the recording process until you finish all the 5 voice instructions/commands of one group. Also, once you start recording, the previous content of that group will be erased.
Download and extract AccessPort from here. This tool will allow us to send HEX commands to the voice recognition module.
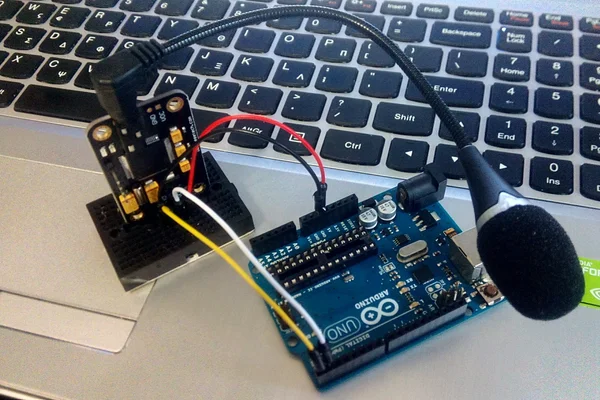
Connection between Arduino* and module for recording procedure:
- Module Vcc to Arduino 5V
- Module GND to Arduino GND
- Module RX to Arduino RX
- Module TX to Arduino TX
*You must remove ATmega328p from board or program it with blink example. If you want you can also use one usb to serial board to complete this procedure.
Available commands:
- Delete Group 1 - send hex AA 01
- Delete Group 2 - send hex AA 02
- Delete Group 3 - send hex AA 03
- Delete All Groups - send hex AA 04
- Record Group 1 - send hex AA 11
- Record Group 2 - send hex AA 12
- Record Group 3 - send hex AA 13
- Import Group 1 - send hex AA 21
- Import Group 2 - send hex AA 22
- Import Group 3 - send hex AA 23
- Query the recorded group - send hex AA 24
Let's get started with our voice commands!
We will record the group 1 with 5 commands: White, Red, Blue, Green and OFF.
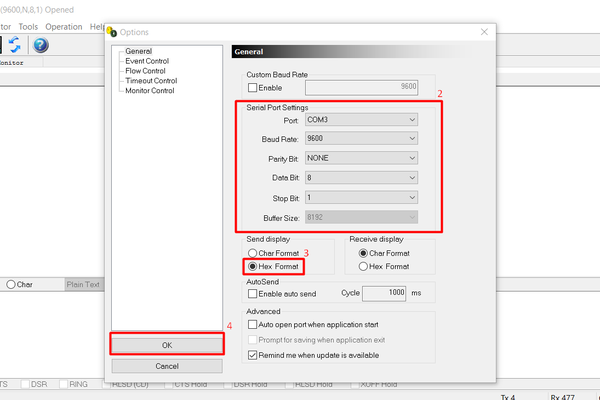
Open AccessPort app and begin the serial communication at 9600 bps. (second image above).
Now click on hex and type AA 11 and click the send button.
This will start the recording procedure for the first group.
In this step, time is the key... You will be asked to record each command (white, red etc) three times.
If you having troubles with this, try to read this manual. When recording is completed type and send AA 21 to test you voice commands.
Disconnect the voice recognition module from the Arduino uno board and proceed to next step.
The circuit
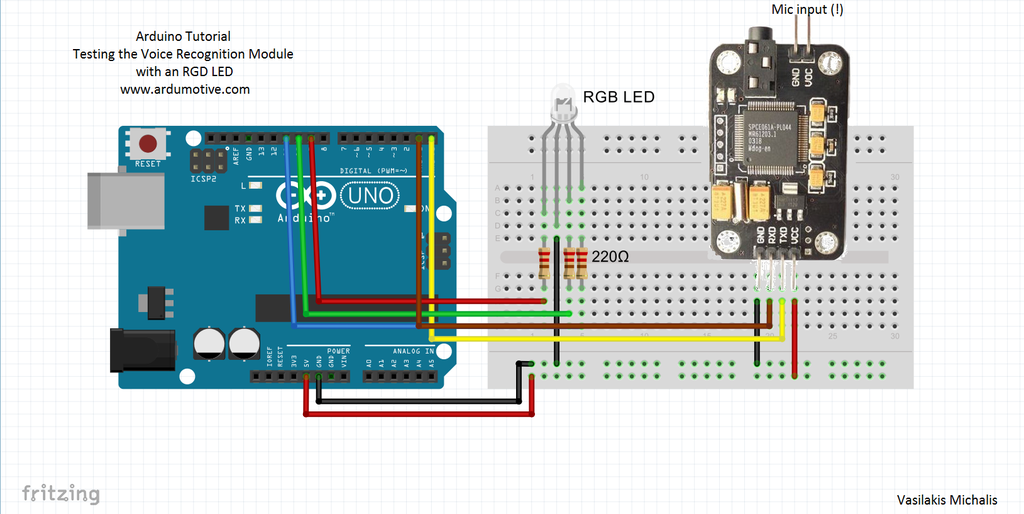
The connections are pretty easy, see the above image with the breadboard circuit schematic.
Note: Module RX - Arduino TX and Module TX - Arduino RX
The code
Here's the code, embedded using Codebender!
Try downloading the Codebender plugin and clicking on the "Run on Arduino" button to program your Arduino board with this sketch. And that's it, you've programmed your Arduino uno board with this sketch!
Well done!
You have successfully completed one more "How to" tutorial and you learned how to use the voice recognition module. What next? Try to add more voice commands to your code.